Difference between revisions of "Barcoding"
Dzhamalova.r (talk | contribs) |
Dzhamalova.r (talk | contribs) |
||
| Line 5: | Line 5: | ||
=== In the Desktop App === | === In the Desktop App === | ||
| − | + | '''Barcode List window''' | |
[[File:Barliswin.PNG|400px|thumb|left|View of the '''Barcodes List''' window]] | [[File:Barliswin.PNG|400px|thumb|left|View of the '''Barcodes List''' window]] | ||
* '''Look For''' box allows finding any item by typing a keyword to look for in any field. You can choose the field in the drop-down box beside the ''Look For'' box. | * '''Look For''' box allows finding any item by typing a keyword to look for in any field. You can choose the field in the drop-down box beside the ''Look For'' box. | ||
Revision as of 22:58, 29 April 2021
With HandiFox you can assign barcodes to products and services, which can then be scanned for quick item selection when entering transactions, counting inventory and in other appropriate situations.

Contents
Assigning Barcodes
Assignment of barcodes to items is possible in both the Desktop app and the Mobile app.
In the Desktop App
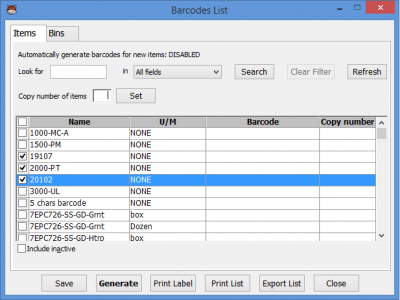
Barcode List window
- Look For box allows finding any item by typing a keyword to look for in any field. You can choose the field in the drop-down box beside the Look For box.
- Search button: It allows finding the item by characteristics set before.
- Clear Filter button allows clearing the data in the Look For box.
- Refresh button allows clearing all the data that was set before saving.
- Copy of number items box allows setting any number of copies of the item's label for printing. Use the Set button to set the number of copies.
- Set button allows setting the number of copies for all the checked items in the list
- Select Item Receipts button: you can use it to work only with Items from chosen Item Receipt.
- Include inactive box allows working with inactive items.
- Save button: you can use it to save new barcodes for items.
- Generate button allows generating barcode numbers for items without barcodes.
- Print Label button allows printing labels for checked items.
- Print List button allows printing the list of barcodes.
- Export List button allows exporting the list of barcodes to a file.
- Close button: click the button to close the Barcodes List screen
Assigning Barcodes in the Desktop App:
- In QuickBooks, go to Menu → HandiFox → Barcodes List to open the Barcode List window.
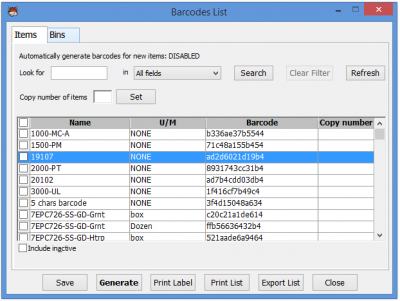
- Enter the barcodes you wish to assign to a specific item in the Barcode column or click on Generate to make the system generate a unique barcode for every item that does not have one assigned yet.
- Click on Save.
Assigning Barcodes in the Mobile App
- Go to Main Screen → Inventory → Item List
- Select the item to which you want to assign a barcode.
- Tap the Edit button.
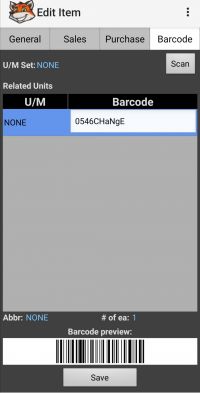
- Switch to the Barcode tab.
- Tap the barcode field next to the U/M to which you want to assign a barcode. Here you can either type in a barcode, or scan one (see Scanning Barcodes).
- Tap Save when you are done, or go back to cancel the operation.
Deleting Barcodes
In the Desktop App
- In QuickBooks, go to Menu → HandiFox → Barcodes List to open the Barcode List window.
- Click on the barcode you wish to delete and manually remove all its characters.
- Click on Save.
In the Mobile App
- Go to Main screen → Inventory → Item List
- Highlight the item from which you want to remove a barcode.
- Tap Edit.
- Switch to the Barcode tab.
- Delete the desired barcode from the barcode field next to the U/M.
- Tap Save when you are done or go back to cancel the operation.
Editing Barcodes
In the Desktop App
- In QuickBooks, go to File → HandiFox → Barcodes List.
- Click on the barcode you wish to edit under the Barcode column
- Enter characters manually.
- Click on Save to save the changes or Close, a confirmation popup will appear, click on NO to discard changes.
In the Mobile App
- Go to Main screen → Inventory → Item List
- Highlight the item from which you want to remove a barcode.
- Tap Edit.
- Switch to the Barcode tab.
- Make the necessary changes to the desired barcode from the barcode field next to the U/M.
- Tap Save when you are done or go back to cancel the operation.
Scanning Barcodes
Scanning with a Built-in Camera
This method is the simplest but the least performant of all, so if you plan on scanning a lot of barcodes regularly, we recommend that you consider other methods described below.
To scan a barcode with your device’s camera, simply tap the Scan button in the mobile app. This button will appear on all screens where barcode scanning is applicable.

Scanning barcodes with the camera requires the Barcode Scanner app to be installed on the device, otherwise, you will be prompted to install it after pressing the Scan button.
Bluetooth Scanner
You can use a wireless Bluetooth barcode scanner with your mobile device for barcode scanning inside the HandiFox app.
The scanner must first be paired with the mobile device (per the scanner’s manual). Once the scanner is paired, open the HandiFox app and go to Admin → Settings → Select Scanner. Tap Scan Bluetooth and wait for the search to complete, then select your scanner from the list.
You can also enter the scanner’s Bluetooth address manually in case automatic discovery fails (this address can be viewed in the Bluetooth section of Android settings, in the properties of the paired scanner).

Only scanners capable of SPP mode will work with HandiFox as advertised. Check the System Requirements for recommended models.
Built-in Scanner
HandiFox supports certain devices with built-in laser scanners. Visit this page to see all the devices supported. On Motorola devices, additional configuring is required to start using the scanner in HandiFox. Please contact us for details.
Exporting and Importing Barcodes
Exporting the List of Barcodes
- Open QuickBooks and go to File → HandiFox → Barcodes List to open the Barcodes List window.
- Click on Export list to export a list of all your barcodes as an Excel or CSV spreadsheet
- Select the drive/folder you want to export your data to
- Choose the file format (.xls, .cvs, .txt) in which you want to save your export file, and click on Save.

Alternatively, barcodes can be exported via the Export/Import window, see Exporting Data for more details
Importing List of Barcodes
See Importing Data.
Printing Barcodes and Labels
Barcode labels can be printed from the desktop app.
Printing the List of Barcodes
- Open QuickBooks and go to File → HandiFox → Barcodes List.
- Click on Print List.
- The printer will open, select printer and click on OK to continue.
Printing Specific Label(s)
- In QuickBooks, go to File → HandiFox → Barcodes List.
- Use the check-boxes in the left-most column to check the items for which you want to print labels.
- Enter the number of copies of each label you wish to print. You can do it both automatically and manually.
- Automatically. Fill the Copy number of items and click on Set. The Copy number column will be filled for all checked barcodes if it was empty before.
- Manually. Enter the number of copies in the Copy number column.
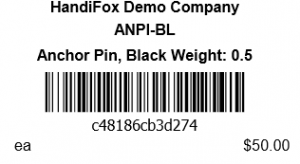
- Click on Print label and select what fields should show up on the labels. The system will generate a document with labels which you can then send to your printer.
- In the Printer window, click on OK to continue.
Printing All Labels
- In QuickBooks, go to File → HandiFox → Barcodes List, Check/Tick the box to the left of the Name column to select all barcodes at once for printing.
- Enter the number of copies you need: you can do it both automatically and manually.
- Automatically. Fill the Copy number of items and click on Set. The Copy number column will be filled for all checked barcodes if it was empty before.
- Manually. Enter the number of copies in the Copy number column.
- Click on Print label and select what fields should show up on the labels. The system will generate a document with labels which you can then send to your printer.
- To close the Print Barcode Label screen, click on Cancel.
- To close the Barcodes List screen, click on Close.


